Code and Run YOLOv8
This chpater will teach you how to clone the YOLO’s source code from ultralytics’ repository, and run the model by default.
Clone Repository
The source code can be stored in many ways. bc model’s source could be large and massive, I recommend to store code in drive rather than Jetson Orin Nano itselves.
The way I use to store the code is NAS (Network Attached File System), and use the resilio-sync to cache the file. It allows me to edit code on more powerful and convinent system like a Mac.
The tutorial of NAS will be created later. The way to store the code is totally up to you.
# Choose or create the directory to store your code
cd ~/Documents
# Git clone
git clone https://github.com/ultralytics/ultralytics.git
# Mainland China
git clone https://gitclone.com/github.com/ultralytics/ultralytics.git
After cloning the repository, go to ubuntu launch pad and open the VSCode
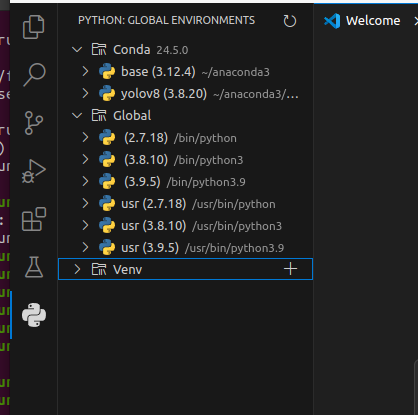
Click the python extension on the left sidebar, you can easliy see the global environments, and the conda environments we just created. Here, we can manage the packages installed like update, remove.
Code the YOLOv8
First, we should download the detection model of YOLOv8, Docs. For Jetson orin nano, I prefer nano and small model, YOLOv8n and YOLOv8s.
# move the .pt file into our ultralytics working directory
mv ~/Downloads/sth.pt ~/Documents/Ultralytics/
Then, open the folder that we cloning the source code. You should have a similar project structure with mine.
Create a new python file named train.py, this simple code import the neccesary packages from ultralytics, and use tensorrt to create a .engine file that can be accelerate by our jetson module.
from ultralytics import YOLO

# Load a YOLOv8n PyTorch model
model = YOLO("yolov8n.pt")

# Export the model
model.export(format="engine")  # creates 'yolov8n.engine'

# Load the exported TensorRT model
trt_model = YOLO("yolov8n.engine")

# Run inference, and store the predict file into ./runs directory
results = trt_model("https://ultralytics.com/images/bus.jpg", save=True)
Remember to open a Jtop on terminal, click the 6CTRL tab and change the fan speed.
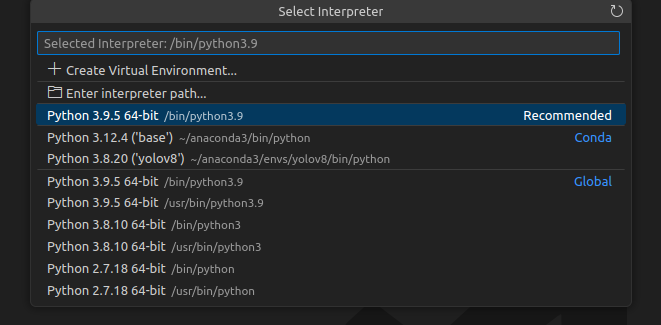
Back to VSCode and your file. press ctrl+shift+p on your keyboard. Type Python: Select Interpreter Choose the conda yolov8 environment we created.
Then click the right triangle button on the right top of the VSCode to run python file.
AND Now, just click the ./runs directory, then you can see the predict result !
Congratulations!