YOLOv8 Segmentation With CSI Camera
This Chapter will teach you how to use CSI camera with Jetson Orin Nano in Python.
Rebuild OpenCV With GStreamer Support
Activate your yolov8 environment by using conda activate yolov8 in terminal.
shell
# go to the dependency directory
cd ~/Dependency
# clone the newest git repository of opencv-python
git clone --recursive https://github.com/opencv/opencv-python.git
# go to the cloned directory
cd opencv-python
# install dependecies
sudo apt-get update
sudo apt-get install -y build-essential cmake git libgtk2.0-dev pkg-config libavcodec-dev libavformat-dev libswscale-dev
sudo apt-get install -y python3-dev python3-numpy libtbb2 libtbb-dev libjpeg-dev libpng-dev libtiff-dev libdc1394-22-dev
sudo apt install libgphoto2-dev
# Set CMake flags
export CMAKE_ARGS="-DWITH_TBB=ON -DWITH_V4L=ON -DWITH_QT=ON -DWITH_OPENGL=ON -DWITH_GTK=ON -DWITH_FFMPEG=ON -DWITH_IPP=ON -DWITH_OPENMP=ON -DWITH_OPENCL=ON -DWITH_CUBLAS=ON -DWITH_NVCUVID=ON -DWITH_EIGEN=ON -DWITH_GSTREAMER=ON -DWITH_LAPACK=ON -DWITH_TIFF=ON -DWITH_JASPER=ON -DWITH_WEBP=ON -DWITH_OPENEXR=ON -DWITH_PROTOBUF=ON -DWITH_1394=ON -DWITH_GPHOTO2=ON -DWITH_LAPACK=ON -DWITH_XINE=ON"

export ENABLE_CONTRIB=0
export ENABLE_HEADLESS=1
# Build the wheel
pip wheel . --verbose
# install
pip install #thewheelfilegenerated under dir.whl
After install opencv-headless, use pip list show opencv-python-headless to make sure your opencv is perfectly installed under conda environment.
Run the Segmentation Test
This code will use the yolov8m-seg.pt as a source to generate the TensorRT model, then open a video stream on camera0, which means you should plug in the fpc cable to the CAM0 port on Jetson Orin Nano Module.
python
import os
import cv2
from ultralytics import YOLO
import time

# create a tensorRT model from a YOLOv8 PyTorch model
model = YOLO("yolov8m-seg.pt")

# export the model
# if the dir do not have a yolov8m-seg.engine file, it will create one
if not os.path.exists("yolov8m-seg.engine"):
    model.export(format="engine")

# load the exported TensorRT model
trt_model = YOLO("yolov8m-seg.engine")

def gstreamer_pipeline(capture_width=1920, capture_height=1080,
                       framerate=30, flip_method=0,
                       display_width=640, display_height=480):
    return (
        "nvarguscamerasrc ! "
        "video/x-raw(memory:NVMM), "
        "width=(int)%d, height=(int)%d, "
        "format=(string)NV12, framerate=(fraction)%d/1 ! "
        "nvvidconv flip-method=%d ! "
        "video/x-raw, width=(int)%d, height=(int)%d, format=(string)BGRx ! "
        "videoconvert ! "
        "video/x-raw, format=(string)BGR ! appsink"
        % (
            capture_width,
            capture_height,
            framerate,
            flip_method,
            display_width,
            display_height,
        )
    )

video_cap = cv2.VideoCapture(gstreamer_pipeline(), cv2.CAP_GSTREAMER)

while video_cap.isOpened():
    success, frame = video_cap.read()
    if success:
        start = time.perf_counter()

        results = trt_model(frame)

        end = time.perf_counter()

        total_time = end - start
        fps = 1 / total_time

        # Visualize the results
        annotated_frame = results[0].plot()

        # Convert color space from RGB to BGR
        annotated_frame = cv2.cvtColor(annotated_frame, cv2.COLOR_RGB2BGR)

        # Display the frame
        cv2.putText(annotated_frame, f"FPS: {fps:.2f}", (10, 30), cv2.FONT_HERSHEY_SIMPLEX, 1,
                    (0, 255, 0), 2, cv2.LINE_AA)
        cv2.imshow("frame", annotated_frame)
				# Press q on the keyborad to exit
        if cv2.waitKey(1) & 0xFF == ord("q"):
            break
    else:
        break

# Release the video capture object
video_cap.release()
cv2.destroyAllWindows()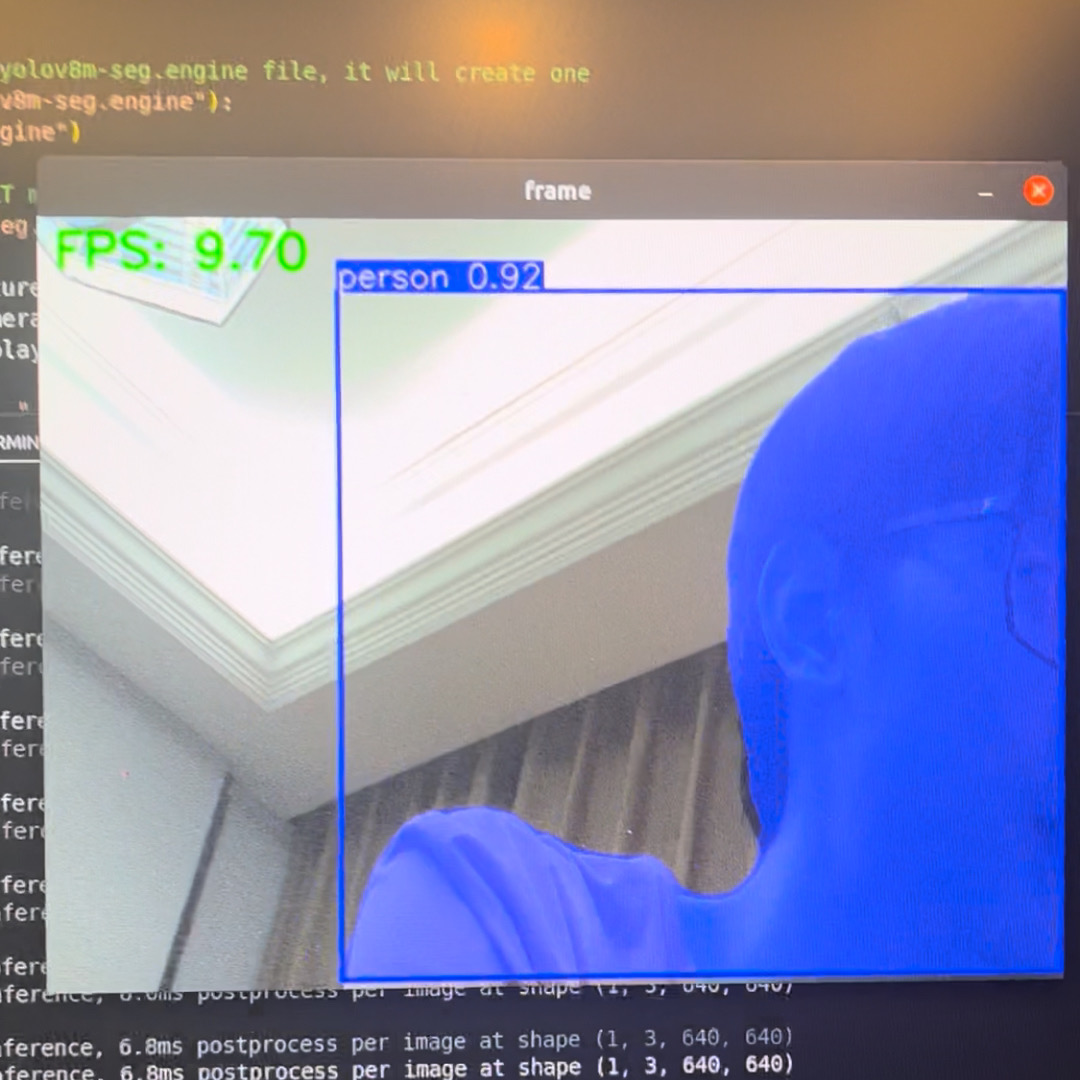
Knowing Running Issues
ImportError: /lib/x86_64-linux-gnu/libp11-kit.so.0: undefined symbol: ffi_type_pointer, version LIBFFI_BASE_7.0
shell
# reinstall.
sudo apt install --reinstall libffi7 libp11-kit0
# find all version of libffi
sudo apt list --installed | grep libffi
# find the location of libffi under /usr
sudo find /usr -name libffi.so.7
# link the local source to conda env
ln -sf /your/path/to/libffi.so.7 ~/anaconda3/envs/[your_env_name]/lib/libffi.so.7
ImportError: /lib/aarch64-linux-gnu/libgomp.so.1: cannot allocate memory in static TLS block. It is the bug of arm machine.
shell
# only way to solve this is to export the environment variable before excute
export LD_PRELOAD=/usr/lib/aarch64-linux-gnu/libgomp.so.1
or export in the file
python
import os
os.environ['LD_PRELOAD'] = '/usr/lib/aarch64-linux-gnu/libgomp.so.1'
import cv2- After running, you may see
GStreamer-WARNING **: … Failed to load plugin … libgstlibav.so … libgomp.so.1: cannot allocate memory in static TLS block
shell
# if you have installed gstreamer, you can find libgstlibav.so in /usr/lib/aarch64-linux-gnu/gstreamer-1.0/libgstlibav.so, you can remove the GStreamer cache to fix it:
rm -rf ~/.cache/gstreamer-1.0/